

Second in a Series DIY Bendix Tredel-Vac Restoration.
Bendix Power Assist Unit
Hydraulic- Reaction Type
Lincoln 1959-1960
Mercury 1956-1958
Special note: there were several types of power cylinders used. I will cover the Hydraulic- Reaction Type. Its very simple in design and easy for the DIY guy or gal.
Parts are Readily available
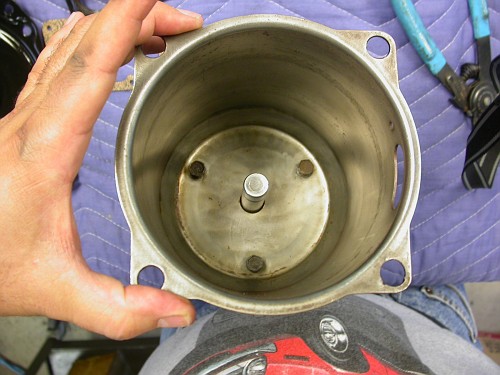
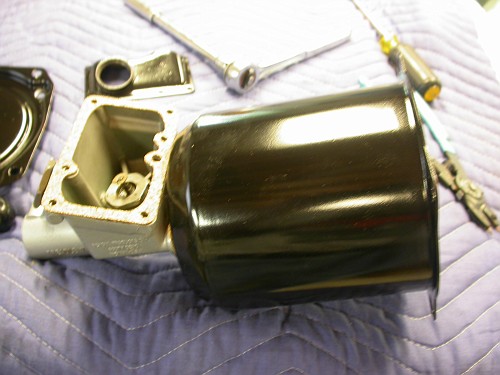

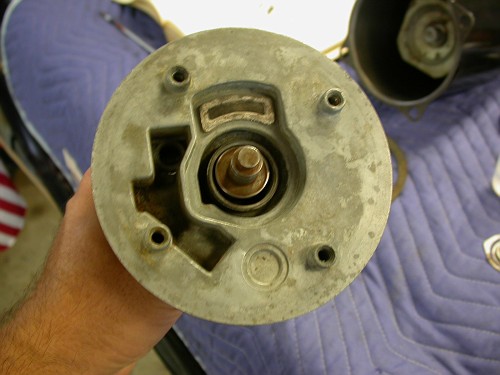
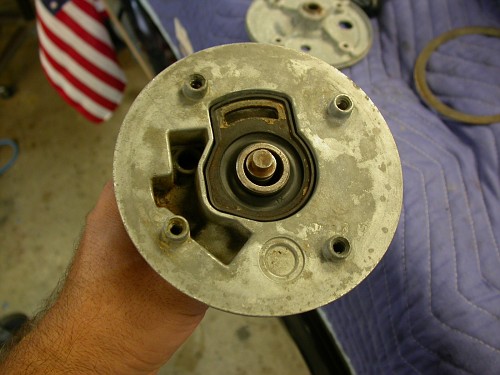
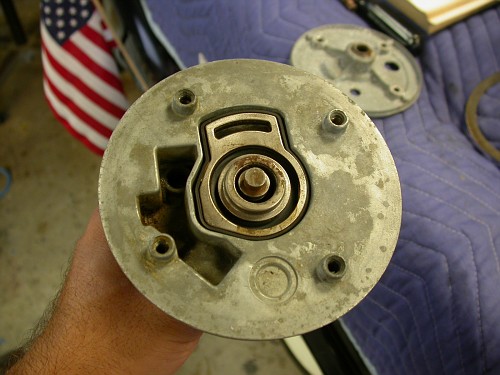
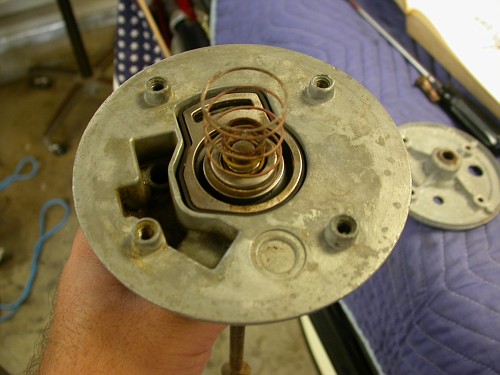
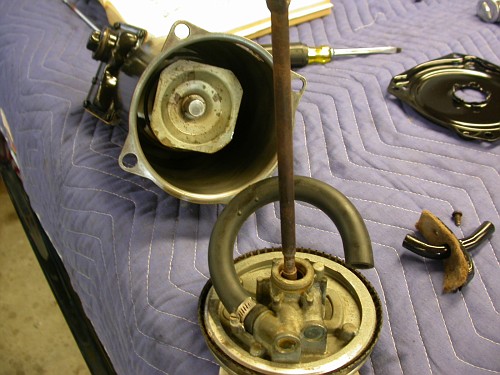
Picture 3746 through 3750 shows the Power Cylinder prepped refinished and ready for re-assembly.
Assemble the power cylinder to the master cylinder with the 3 cap screws and washers as indicated.
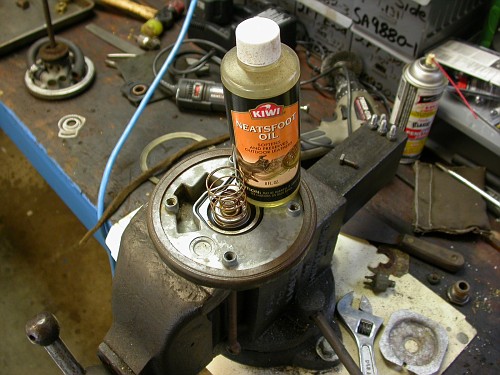
Next: Pull out the plunger to the end of its stroke. Place the large end of the retainer spring into the power cylinder. Compress the spring with the retainer and install the retainer washer in the grove of the plunger.
Assuming the power cylinder is clean, apply a thin film of Neatsfoot oil to the inside wall.
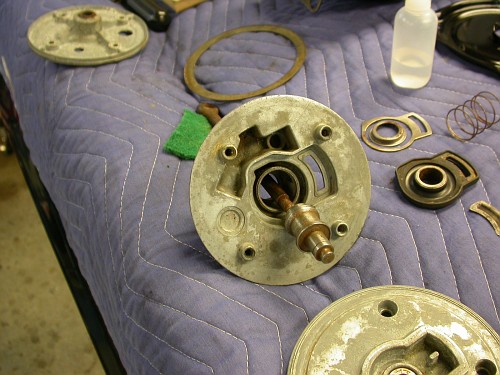
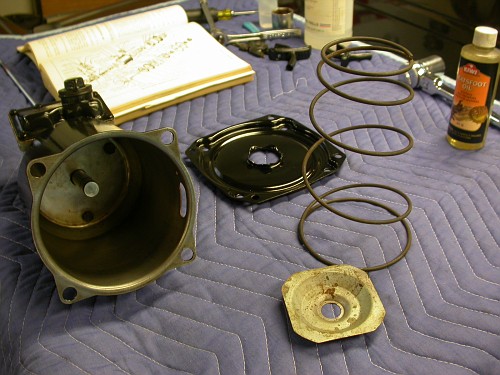
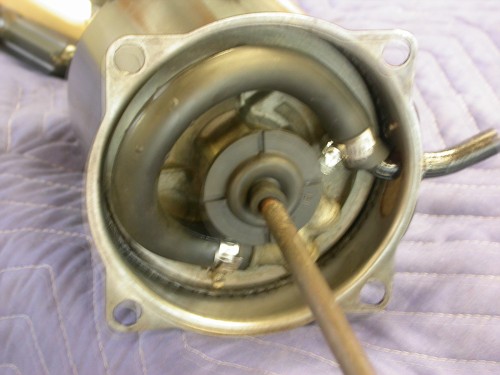
Picture 3751 and 3752 Shows the internal components of the booster.
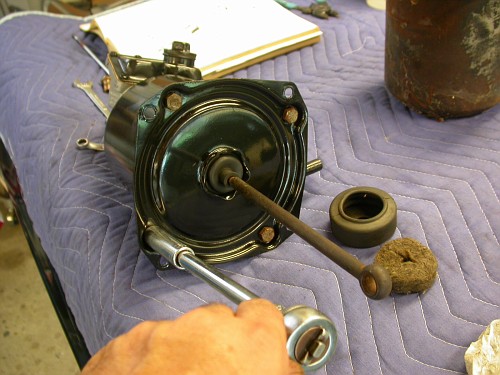
Picture 3753 through 3758 shows the assembly sequence of the internal parts.
Clean all parts and assemble as shown. Pay attention to the condition of the rubber insert in frame 3754. It should be in good condition with no cracks.
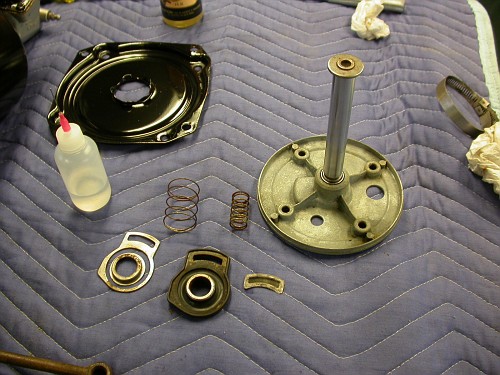
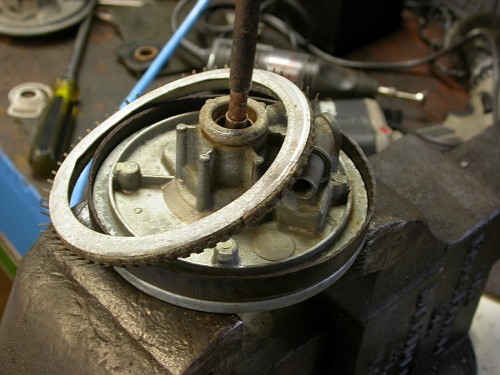
Picture: 3758 Place the leather packing over the piston assembly as shown. Prep the leather ring by giving it a liberal coating of Neatsfoot oil. In frame 3759 the front plate is installed with 4 cap screws and washers.
Be careful when tightening this is a casting.

Picture 3760 and 3761. The cotton wick needs to be prepped. To do this take a coffee can and lid, fill it with warm water and a bit of liquid detergent. Place the wick inside and shake vigorously. The point is to clean and remove any brake fluid residue. Rinse it out and then roll it up in a paper towel and squeeze. Use a hair dryer or just let it dry in the sun.
When dry you can now saturate the wick with Neatsfoot oil. Place the wick inside the expansion fingers and place the retaining pig over as shown. Refer to frame 3760. Then snap into place. Refer to frame 3761.
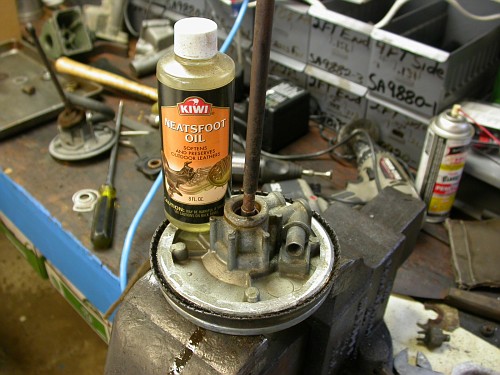
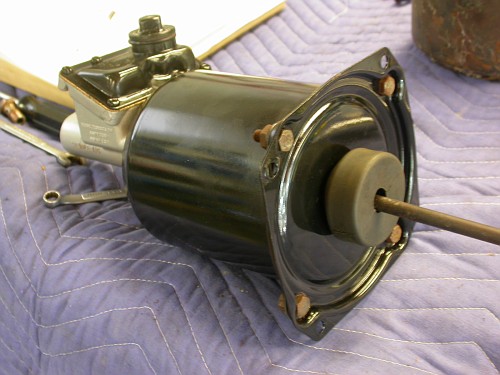
You are now ready for final assembly, refer to frame 3762.

Picture 3763 Apply a daub of grease to the plunger receiver at the front of the piston assembly.
Be sure to install the vacuum hose as indicated.
Assemble the piston to the vacuum cylinder. Orient the piston assembly as shown while at the same time installing the outer fitting and clamp.
Note the cotton filter tucked in the fitting. You can clean this the same way as the cotton wick.
Picture: 3766 Place the new paper gasket between the cylinder and the end plate and bolt it up.
Picture 3767 Assemble the felt boot and install the boot over the push rod onto the end plate.
That completes the restoration.
Testing:Check all vacuum lines for leaks. Check the Auxiliary vacuum can in the right front wheel well. Many times this is a critical item that is over looked. Remove the canister and empty out the brake fluid and oil mixture that has accumulated over the years. Then pressurize and check for leaks. This is a steel canister and it can be brazed if a leak is found. You can braze together two juice cans in the worst case.
Road test the vehicle:
Apply the brakes at about 25 MPH It should stop evenly with no pulling.
Pulling indicates a wheel cylinder, brake line hose or contaminated brake lining.
A spongy pedal feel means there is air in the line. Bleed the system.
With the car running Apply the parking brake Place the transmission in neutral stop the engine. Depress the brake pedal several times and hold. Start the engine. If the vacuum booster is operating the pedal will go down a little and you will need less pressure to hold it. If you don’t feel a difference the vacuum system is not functioning .
With the engine off Exhaust all the vacuum and hold the brake pedal down. If the brake pedal falls away under pressure that is an indication that the hydraulic system is leaking.
Special Thanks to:
Walter
Kanter auto Parts
Rustolum
Kiwi Leather products
Engineering office M-E-L Division
Ford Motor Company